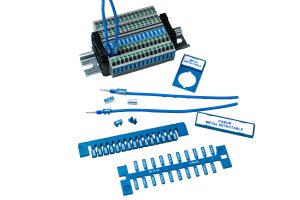
Accessories for correct installation

UMCT3149

NEW_EMPTY

Cabur Solar crimping pliers with interchangable insert

Pliers with fixed or exchangable inserts
Suitable for Cabur Solar Connectors, ferrules, ring and spade
Stripping pliers in pocket version for a rapid and easy operation

Additional information

Series
Code
Type
HS code
Quantity / Package (Insert)
Code
Type

NOTES

To ensure the guarantee’s effectiveness, the use of Cabur Solar tools, in conformance with the standards and instructions found in Cabur official documentation, is an essential requirement

For further information see PDF catalog

No accesories available for this item
CABUR Z121123 ACCESSORIES FOR MOUNTING RAILS ACI SERIES
Z121421
M6 x 10 screw for ground bar Z121123
CABUR Z121116 ACCESSORIES FOR MOUNTING RAILS ACI SERIES
Z121415
Angled bracket 18x40xH40mm for DIN rail fixing
CABUR Z121316 ACCESSORIES DOR MOUNTING RAILS ACI SERIES
Z121410
Angled bracket 20x80xH98mm for DIN rail fixing
CABUR Z121316 ACCESSORIES DOR MOUNTING RAILS ACI SERIES
Z121319
Angled bracket 20x80xH88mm for DIN rail fixing
CABUR Z121316 ACCESSORIES DOR MOUNTING RAILS ACI SERIES
Z121318
Angled bracket 20x80xH78mm for DIN rail fixing
CABUR Z121316 ACCESSORIES DOR MOUNTING RAILS ACI SERIES
Z121317
Angled bracket 20x80xH68mm for DIN rail fixing
CABUR Z121316 ACCESSORIES DOR MOUNTING RAILS ACI SERIES
Z121316
Angled bracket 20x80xH58mm for DIN rail fixing
Z121314N
Angled bracket for mounting rail, 20x80xH49 mm (discontinued)
CABUR Z121116 ACCESSORIES FOR MOUNTING RAILS ACI SERIES
Z121314
Angled bracket 20x80xH49mm for DIN rail fixing with M6 screws
Z121311N
Angled bracket for mounting rail, 20x80xH49 mm (discontinued)
CABUR Z121116 ACCESSORIES FOR MOUNTING RAILS ACI SERIES
Z121311
Angled bracket 20x80xH49mm for DIN rail fixing with M5 screws
CABUR Z121123 ACCESSORIES FOR MOUNTING RAILS ACI SERIES
Z121307
Bracket for equipotential ground bar
CABUR Z121116 ACCESSORIES FOR MOUNTING RAILS ACI SERIES
Z121301
Angled bracket 20x120xH49mm for DIN rail fixing and ground bar
CABUR Z121116 ACCESSORIES FOR MOUNTING RAILS ACI SERIES
Z121228
Angled bracket 18x40xH53mm for DIN rail fixing
CABUR Z121123 ACCESSORIES FOR MOUNTING RAILS ACI SERIES
Z121221
Insulator holder 15x25mm for graund bar Z121123
CABUR Z121213 ACCESSORIES FOR MOUNTING RAILS ACI SERIES
Z121219
Flat bracket 20x80xH90mm for DIN rail fixing
CABUR Z121213 ACCESSORIES FOR MOUNTING RAILS ACI SERIES
Z121218
Flat bracket 20x80xH70mm for DIN rail fixing
CABUR Z121213 ACCESSORIES FOR MOUNTING RAILS ACI SERIES
Z121217
Flat bracket 20x80xH50mm for DIN rail fixing
CABUR Z121213 ACCESSORIES FOR MOUNTING RAILS ACI SERIES
Z121216
Flat bracket 20x80xH40mm for DIN rail fixing
CABUR Z121213 ACCESSORIES FOR MOUNTING RAILS ACI SERIES
Z121215
Flat bracket 20x80xH30mm for DIN rail fixing

HOW TO STRIP WIRE USING IS31579002

  1. The wire stripper works like a guillotine, suitable for wires of various thicknesses, allowing for fast and safe stripping.
  2. It acts simultaneously on both the sleeves of the photovoltaic wire, cutting them precisely.
  3. The blades move parallel to the wire, expelling the sheared off sleeve.


STRIPPING WITH IS3170

This wire stripper is able to strip wires with sections of 2.5, 4, 6 and 10 mm2. It is fitted with an end stop and allows for a stripped constant length of approx. 8 mm, compliant with the requirements of our PINS. The blade can be replaced.

  • To strip wires with a 2.5 mm2 section, the blade must make a complete turn around the external perimeter of the wire.
  • To strip wires with a 4 mm2 section, the blade must make two complete turns around the external perimeter of the wire.
  • To strip wires with a 6 mm2 section, the blade must make three complete turns around the external perimeter of the wire.

In order to preserve the number of strands, the blade should not be turned more times than those indicated in the recommendations above for each wire section.


HOW TO CHANGE THE UMCT CRIMPER MATRIX

  • Open the pliers as wide as possible (fig. 1);
  • slowly bring the two levers of the pliers together, until the locking/release mechanism makes three clicks (fig. 2);
  • observe the anchorage pin on the matrix (fig. 2);
  • insert the matrix, moving the anchorage pin towards the internal part of the pliers chamber (fig.3);
  • make sure that the plastic tooth has locked the matrix in place or that it has risen (fig.4);
  • press the two levers of the pliers, closing them as tightly as possible (fig.4);
  • release the handles; the pliers should open automatically and completely (fig.5);
  • if, when the pliers are closing, you realise that thecrimping is not successful or the crimp tool is blocked for any reason, it can be released by pressing and releasing the handles a few times and simultaneously pressing with your thumb on the release lever on the
    internal part of the handle (fig.6).

IN THE SAME CATEGORY

ISCRIVITI ALLA NEWSLETTER

Name(Required)
Email(Required)
Address(Required)
Privacy(Required)
The consent to the subscription to the Cabur Newsletter can be revoked, at any time, using the unsubscribe procedure available on the emails sent. PRIVACY POLICY

CABUR CUSTOMER CARE

for technical support
+39 019 58999.219  customercare@cabur.it
for commercial support
+39 019 58999.609 vendite@cabur.it

from monday to friday 8:30-12:30 13:00-17:00